

| Attention Before you read this post, I highly recommend you check out my resources page for access to the tools and services I use to not only maintain my system but also fix all my computer errors, by clicking here! |
Error code 0x800f0991 is another Windows Update issue that occurs during the installation of any number of updates, patches etc… The root cause of the problem may vary, but typically the error signifies a problem with the Windows Update component itself.
Windows updates are an integral aspect of your systems security, health and general performance. Microsoft is always aiming to improve and protect their line of operating systems through the release of constant and regular updates. These updates can be put into three categories:
- Feature Updates: Which are designed to add new features and functionalities to the OS.
- Security Updates: Explicitly created to patch known vulnerabilities, improving the overall protection of the OS.
- Quality Updates: That enhance already existing features, while addressing recently encountered bugs and problems.
The entire process can be and typically is automated, requiring next to no input by the user.
However, Windows Update isn’t without its problems, as proven by this post. Error 0x800f0991 can and typically does occur. Many users have noted, that it occurs most frequently when attempting to install the Windows 11 Insider Preview Update. When the error occurs, it will oftentimes resemble the following:
Windows 11 Insider Preview 10.0.25411.2041 (ni_release)
Install error 0x800f0991.
If this looks or sounds familiar to you, then you’ve come to the right place. Continue reading for a breakdown of its common causes.
What Causes Windows Update Error 0x800f0991?
As is typically the case with Windows Update errors, they can, and typically do, disrupt the OS update process, preventing your system from receiving critical updates. The error code will usually appear during or after the installation process, indicating that the update did not complete.
So, why does this occur? Honestly, there are a number of reasons, but the most common of which can be summarised into the following:
- Essential Windows Services, required by Windows Update have crashed or been disabled.
- The SoftwareDistribution folder has been corrupted, prohibiting future Windows Updates.
- Integral system files have been corrupted. Files that could be required by the Windows Update component.
So, what can you do to fix it? Continue reading, for those much desired solutions.
How to Fix It
When it comes to fixing Windows Update error 0x800f0991, there are a number of options available to you. Firstly, adopting solutions to its most common causes, should be your first approach. However, that may or may not be enough to fix this problem.
So, as is typically the case, I prefer to start small. So, before attempting any of the more sophisticated solutions below, you should first consider disabling your internet security solution.
If you use a third-party tool, then it’s possible it’s interfering with the Windows Update process. So, disabling it, temporarily, just to determine whether or not it’s to blame, may be in order.
The exact instructions on how to disable your security solution will vary. But typically, you should be able to do it through its GUI (Graphic User Interface).
Use Windows Repair Tool to Fix Windows Update Error 0x800f0991
If the simple solution of disabling your security tool failed to fix the error, then you should definitely consider using a Windows repair tool.
The tool I have in mind is called Advanced System Repair Pro, and it is an advanced repair tool (as the name suggests), capable of detecting and fixing the known causes of Windows Update errors.
Additionally, it’s capable of fixing BSOD errors, app errors, registry corruption, DLL errors, malware infections and more.
It’s also capable of optimising your systems performance, making it an all-around, maintenance, repair and security suite.
If that interests you, then visit the link below for more information:
CLICK HERE TO CHECK OUT ADVANCED SYSTEM REPAIR PRO
 The solution(s) below are for ADVANCED level computer users. If you are a beginner to intermediate computer user, I highly recommend you use the automated tool(s) above! The solution(s) below are for ADVANCED level computer users. If you are a beginner to intermediate computer user, I highly recommend you use the automated tool(s) above! |
Use Disk Cleanup
Another common cause of Windows Update error 0x800f0991 is insufficient hard disc space. So, as a next solution, you should definitely consider freeing up space.
To do this, you have several options, the simplest is to manually remove apps from your system. Just do the following:
1. Boot into your system as an admin.
2. Then press  + R, type Appwiz.cpl and click on OK.
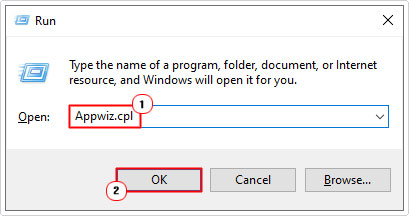
3. When Uninstall or change a program loads up, simply click on an App then click on Uninstall.

Note: You can arrange the apps in order of size. So you can remove larger apps from your system to free up as much space as possible.

Restart Windows Services
There are a number of Windows services that are required by Windows Update for it to function. BITS is amongst the most important. One relatively effective method entails restarting this service (along with several others), in an attempt to fix error 0x800f0991.
To do that, follow the simple steps below:
1. First, boot into your system as an admin.
2. Now, press + R, type Services.msc and click on OK.
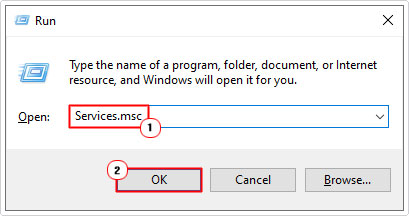
3. This will bring up Services, simply right-click on Background Intelligent Transfer Service and select Restart.

Note: If the Service is stopped, then Restart will be greyed out. In which case, click on Start.
4. Repeat Step 3 for Cryptographic Services, Windows Update and Windows Installer.
Reset Windows Update
As previously noted, error 0x800f0991 can occur as a result of an issue with one of several Windows Update components. Thus, one viable way of fixing this issue involves resetting the components belonging to this feature.
To do that, you can find instructions on my post on fixing Windows Update Error 0x80d02002.
Install Update Manually
If the error still occurs, after attempting all the solutions above, you may want to consider a manual install. That means, downloading the update, manually, from the Microsoft Update Catalog and applying it yourself.
To do that, you will need the KB number of the update, and access to the Update Catalog. For more information check out update error 0x80246019.
Upgrade Windows
This process involves downloading and running a mounted Windows ISO file, to upgrade and hopefully replacing any and all corrupted components within your operating system.
If error 0x800f0991 continues to persists, then this should be your go to.
To implement this method, simply do the following:
1. First, boot into your system as an admin, then visit the following Microsoft Link: https://www.microsoft.com/en-us/software-download/windows11
2. Scroll down, then select Windows 11 (multi-edition ISO for x64 devices) from the dropdown menu and click on Download Now.

3. Next, Select the product language and click on Confirm.

4. Lastly, click on 64-bit Download and save it to your Desktop.

5. Now, right-click on the ISO and select PowerISO -> Mount image to drive.

Note: For this tutorial I’m using PowerISO.
6. Lastly, press + R, type … and click on OK.
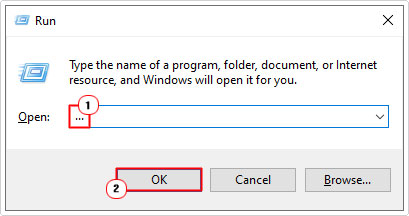
7. This will bring up File Explorer, simply select the newly mounted drive and click on Setup and follow the onscreen instructions.

Once the upgrade has completed, you can now verify whether or not it fixed the Windows Update error.
Run DISM & SFC to Fix Update Error 0x800f0991
SFC and DISM are two built-in Windows repair tools, capable of restoring the integrity of your operating system by replacing missing and/or corrupt files.
For additional help and instructions on how to run and use these tools, check out my post on fixing D3dx9_43.dll Is Missing errors.
Are you looking for a way to repair all the errors on your computer?

If the answer is Yes, then I highly recommend you check out Advanced System Repair Pro.
Which is the leading registry cleaner program online that is able to cure your system from a number of different ailments such as Windows Installer Errors, Runtime Errors, Malicious Software, Spyware, System Freezing, Active Malware, Blue Screen of Death Errors, Rundll Errors, Slow Erratic Computer Performance, ActiveX Errors and much more. Click here to check it out NOW!