| Attention Before you read this post, I highly recommend you check out my resources page for access to the tools and services I use to not only maintain my system but also fix all my computer errors, by clicking here! |
When Java is installed on your system, without issue, it means, apps and games that require Java, work, without hiccup. However, there are instances when issues may arise, which can cause errors such as “Could not create the Java Virtual Machine”. Essentially, this means Java was unable to launch the virtual machine which is required to start the Java-based application.
In this tutorial, we’ll go through the various aspects of your Java Virtual Machine error, exploring its different causes, while providing a number of solutions that you can implement right now, to fix it.
Symptoms of Java Errors
- App downtime: Depending on the circumstances of your computer setup. This could mean, an inability to launch a vital app required for operational duties.
- Data Problems: Issues of data integrity can arise if a Java-based app is effected by this specific error.
- Hampered Functionality: Such errors can result in only partial access to certain apps; this can have all kinds of ramifications for the app(s) in question.
To properly tackle this problem, users must consider a wide range of things, such as, ensuring their Java is up-to-date and working. That the issue isn’t as a result of system inefficiency, i.e. lack of memory. Users may also be required to alter specific system settings to get the most out of Java.
With all of that said, let’s take a look at the most commonly known causes of “Could not create the Java Virtual Machine” errors.
What Causes “Could not create the Java Virtual Machine” Errors?
In most instances, signs of the following error, are a positive indications that your system either, lacks the appropriate available memory or is misconfigured. All-in-all, you should consider the following:
- Java is misconfigured: The “Could not create the Java Virtual Machine” error may be the result of the memory allocation (heap size) being set to low.
- Corrupt Installation: A corrupt installation of Java can result in, missing integral files. Thus, inhibiting or halting Java operations.
- Conflicting Java Installations: It’s possible more than one copy of Java exists on your system.
- Issue(s) with System Environment Variables: There could be a problem with the PATH or JAVA_HOME settings.
- Lack of memory: Your system may not meet the recommended minimum specifications to run the desired app or game.
Java errors are known to cause significant disruption to any computer system, as they can impair system performance and reduce functionality.
Given the temerity of such errors, immediate attention and thus, action, must be taken to rectify this problem. Below, we will go through a number of fixes, all of which have proven effective, at remedying the “Could not create the Java Virtual Machine” error.
How to Fix It
There are a number of solutions that you can deploy, when attempting to tackle the “Could not create the Java Virtual Machine” error. So, let us begin.
The first thing you want to ensure, before anything else, is that Java is properly installed on your system. To do that, simply follow the steps below:
1. First, boot into your system as a full administrator.
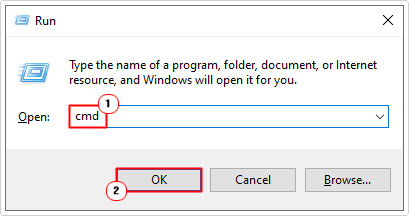
2. Then press  + R, type cmd and press CTRL + Shift + Enter.

3. This will bring up Command Prompt, from here, type the command below and press Enter.
Java –version
Note: If Java is properly installed on your system, you should see the Version, SE Runtime Environment and VM Build.

If you have an outdated version of Java on your system, then you should update it, here: https://www.java.com/en/download/manual.jsp
Otherwise, if everything looks okay, then I suggest you attempt the various solutions below:
Use Windows Repair Tool to Fix “Could not create the Java Virtual Machine” Errors
Is your system currently hampered by a litany of issues and errors (such as “Could not create the Java Virtual Machine”)? If so, then I think it’s probably time, you scanned your system using a Windows repair tool.
The tool I have in mind is called Advanced System Repair Pro, and it is a multifaceted, highly advanced app, capable of scanning, detecting and fixing stubborn system issues, in one go.
With this tool you can expect to fix runtime errors, BSOD errors, registry errors, fatal errors (such as “Could not create the Java Virtual Machine”) and much more.
When installed and setup, it will regularly scan and repair your system, ensuring it stays problem-free.
If any of this interests you, then I recommend you visit the link below:
CLICK HERE TO CHECK OUT ADVANCED SYSTEM REPAIR PRO
 The solution(s) below are for ADVANCED level computer users. If you are a beginner to intermediate computer user, I highly recommend you use the automated tool(s) above! The solution(s) below are for ADVANCED level computer users. If you are a beginner to intermediate computer user, I highly recommend you use the automated tool(s) above! |
Run Java as an Admin
There have been recorded instances, when a virtual machine error (such as “Could not create the Java Virtual Machine”) was the result of lack of user privileges. To determine whether or not that is the cause in your case, it’s suggested that you run the Java app, as an administrator.
To do that, simply follow the steps below:
1. First, boot into your system as an administrator.
2. Now, type Java into the Type here to search box and right-click on Configure Java and select Open file location.

3. This should bring up the Java shortcut folder, from here, right-click on Configure Java and select Properties.

4. The Configure Java Properties applet should pop up. On the Shortcut Tab, click on Open File Location.

5. The Java folder should open. Now, right-click on Java and select Properties.

6. Java Properties will appear. From here, click on the Compatibility Tab, then tick the box for Run this program as an administrator. Then click on OK.

Increase Memory Limitation for Java
One of the more common causes for “Could not create the Java Virtual Machine” errors is a lack of available memory for the VM client, when it attempts to launch.
Java has a default set heap size, from the moment it is installed. This means, if anything exceeds this limit, then it can cause the error that you are seeing.
Fortunately, it is possible to adjust this memory limitation. To do so, simply follow the steps below:
1. First, boot into your system as an admin.
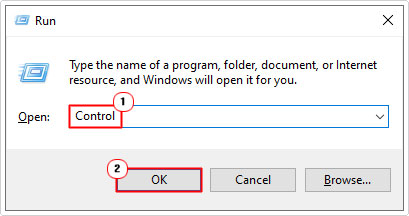
2. Then, press  + R, type Control and click on OK.

3. When Control Panel loads up, type Environment Variables into the Search Control Panel box, then click on Edit the system environment variables.

4. This will bring up the System Properties applet. Next, click on Environment Variables (on the default Advanced Tab).

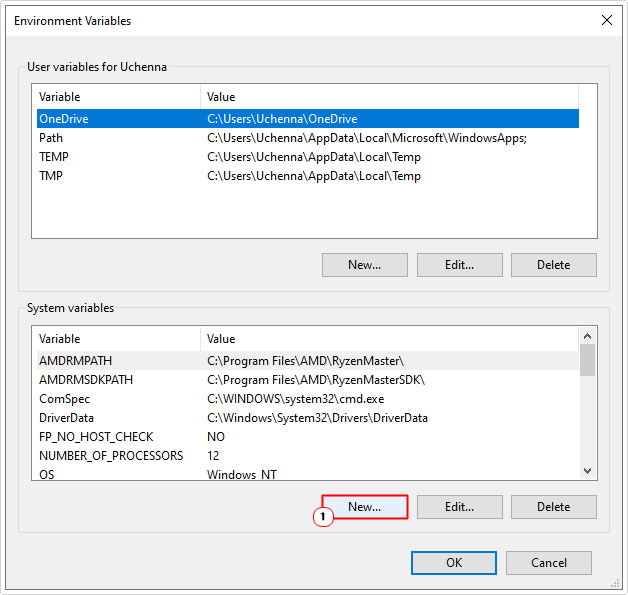
5. The Environment Variables applet will appear. Now, under System Variables, click on the New button.

6. A New System Variable box will appear. Type _JAVA_OPTIONS into the Variable name box. Then type -Xmx512M into the Variable value box. Then click on OK.

This will change the memory limitation for Java to 512Mb. This change should take effect right away. So you can verify whether or not the app it working, by immediately trying to run it.
If the error persists, then you can try changing the memory limitation to 1024Mb by using the value –Xmx1024M.
Reinstall Java
If the above solutions fail to fix the “Could not create the Java Virtual Machine” error, then you could try a reinstallation. This is a fairly simple process. All you need to do is, remove your current version of Java, then reinstall the latest one.
To do that, follow these steps:
1. Boot into your system as an admin.
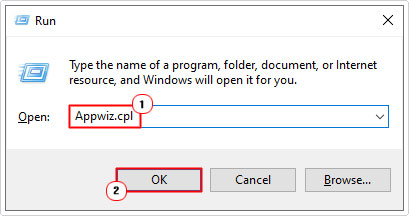
2. Then press  + R, type Appwiz.cpl and click on OK.

3. This will bring up Program and Features, click on Java, then click on Uninstall.

Note: Click on Yes, to confirm the Uninstallation.

4. Once Java has been successfully removed. You can download the latest version from here: https://www.java.com/en/download/manual.jsp
Note: If you use both a 32-bit and 64-bit browser, then you will need to install both versions of Java on your system.
5. Once you have downloaded and installed Java to your system, restart your computer, then verify whether or not it has fixed the “Could not create the Java Virtual Machine” error.
Clean Boot State
In a clean boot state, the operating system will start barebones with only the essential apps and services. If Java refuses to reinstall, then attempting the installation process in this state is your best option.
For instructions on how to load up Windows in a clean boot state, check out my post on fixing Windows Update Error 0x80096004.
Are you looking for a way to repair all the errors on your computer?

If the answer is Yes, then I highly recommend you check out Advanced System Repair Pro.
Which is the leading registry cleaner program online that is able to cure your system from a number of different ailments such as Windows Installer Errors, Runtime Errors, Malicious Software, Spyware, System Freezing, Active Malware, Blue Screen of Death Errors, Rundll Errors, Slow Erratic Computer Performance, ActiveX Errors and much more. Click here to check it out NOW!

